Application Instructions
 Before beginning, please read through the instructions. If at any point you are having difficulty applying your wall statement, please STOP and contact us so that we can help you trouble shoot the problem before any damage is done to the wall statement. Contact us at christianstatements@gmail.com
- Understanding the Three Layers of Your Vinyl Wall Statement:
- Top Layer: (Transfer tape) this layer feels similar to masking tape and is placed on top of the vinyl wall statement.
- Middle Layer: The vinyl wall statement/design that will be your final product.
- Bottom Layer: (Backing Paper) Thick white paper with grid pattern.
Practice Decal: If this is your first time installing vinyl wall decals, please use the practice decal first that is included and follow the installation instructions. You can also use the practice decal to test your wall type to see how the decal adheres.
STEP 1: Prepare Surface and Wall Statement
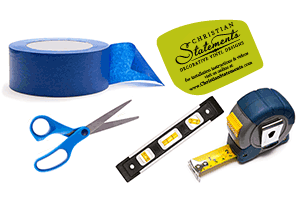
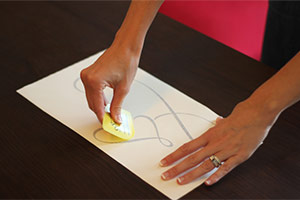
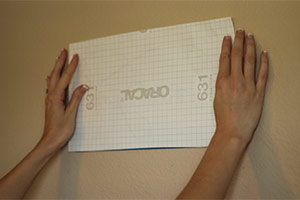
Wipe your walls down with a dry towel before you install your vinyl wall statement. Make sure they are dry before you apply anything. Unroll the design and place it in a warm place and until it no longer curls. Lay the wall statement out on a flat surface with the transfer tape (smooth surface) facing up so that you can see/read the full design. Rub over the entire surface of the wall statement with your squeegee tool affixing any letters that may have detached from the transfer tape (1A). Use a straight edge ruler and a pencil to draw a straight line across the wall statement. You will then use your level to line up to this guideline on the wall and make the wall statement level.
Wipe your walls down with a dry towel before you install your vinyl wall statement. Make sure they are dry before you apply anything. Unroll the design and place it in a warm place and until it no longer curls. Lay the wall statement out on a flat surface with the transfer tape (smooth surface) facing up so that you can see/read the full design. Rub over the entire surface of the wall statement with your squeegee tool affixing any letters that may have detached from the transfer tape (1A). Use a straight edge ruler and a pencil to draw a straight line across the wall statement. You will then use your level to line up to this guideline on the wall and make the wall statement level.
STEP 2: Position and Taping the Wall Statement
Position and level your wall statement on your surface. Apply a piece of painters tape using one of the following methods:
A. Top Hinge Method (Works well with 24” or smaller)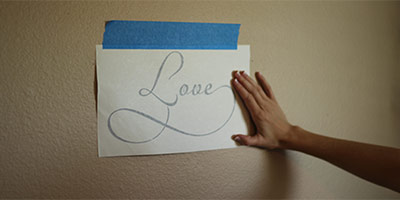
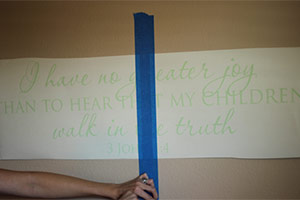
B. Center Hinge Method (Works best with 32” or larger)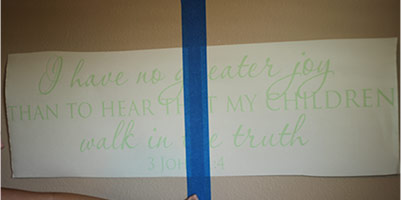
STEP 3: Removing Your Backing Paper
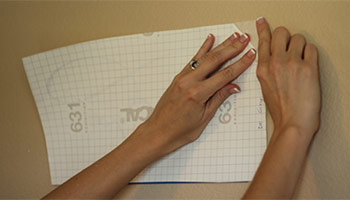
Before you begin Step 3: The most common mistake is that the wall statement is peeled with the transfer tape and design FACING UP. This step is much easier with the backing paper (grid side) face up. The vinyl must remain on the transfer tape.
Before you begin Step 3: The most common mistake is that the wall statement is peeled with the transfer tape and design FACING UP. This step is much easier with the backing paper (grid side) face up. The vinyl must remain on the transfer tape.
NO
Do NOT Peel w/Graphic Facing Up
YES!
Remove Backing Paper (grid side) Face Up
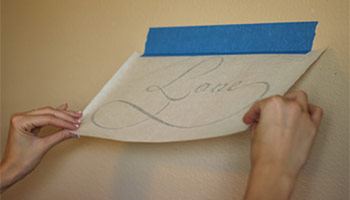
If using the Top Hinge Method, flip the wall statement up so that the backing paper is facing you.
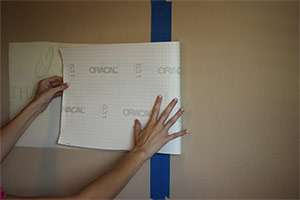
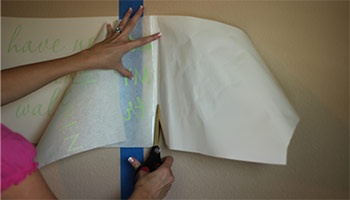
If using the Center Hinge Method, flip one half of the wall statement over the hinge so that the backing paper is facing you.
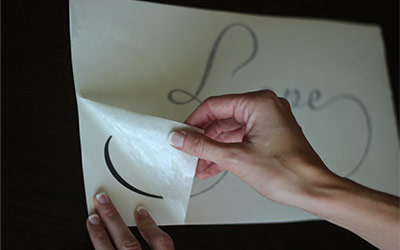
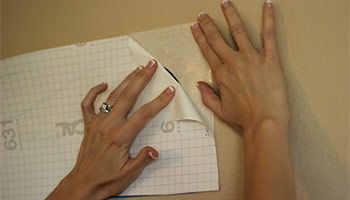
With the backing paper (grid side) facing you, begin peeling the backing paper (grid side) away from the transfer tape (3A). Start in the corner of the backing paper and pull at a tight angle almost creating a crease in the backing paper (3B). Keep the angle tight as you roll the backing paper (grid side) away from the transfer tape keeping it close to the wall. The vinyl will now remain on the transfer tape (3C) as you peel the backing paper away. Again, TAKE YOUR TIME and SLOWLY roll the backing paper to make sure that the vinyl is staying on the transfer tape and not remaining on the backing paper (grid side). If there is vinyl sticking to the backing paper simply roll the backing paper back over the affected area and firmly press with your finger on the affected area to adhere the vinyl to the transfer tape and then continue peeling.
 If the backing paper is NOT removing easily at this point, please STOP and contact us so that we may help you trouble shoot through this step. This step is critical in order to ensure that the decal is not damaged.
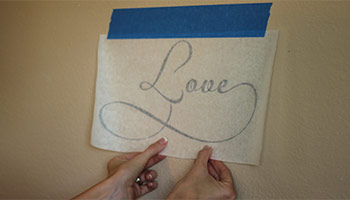
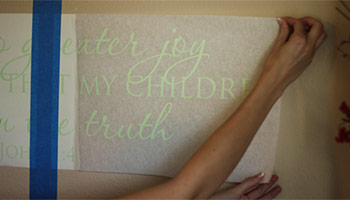
At this point the vinyl statement should be on the transfer tape (3D). You will be left with the backing paper which will now be blank. Discard this piece. If using Center Hinge- Cut the remaining backing paper off (3E). Now you can lay the wall statement back down onto the wall and position (3E). Gently lay the wall statement onto the wall as shown in (3F) and prepare to squeegee.

 If using the Top Hinge Method, flip the wall statement up so that the backing paper is facing you.
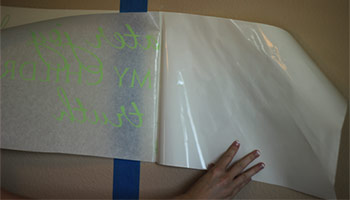
 If using the Center Hinge Method, flip one half of the wall statement over the hinge so that the backing paper is facing you.
STEP 4: Squeegee the Wall Statement
If using a Center Hinge Method...
Remove the blue painters tape from the center. Now you will repeat STEPS 3 & 4 to apply the second half of the wall statement. You can also use your finger to make sure they vinyl is adhering to the wall.
Remove the blue painters tape from the center. Now you will repeat STEPS 3 & 4 to apply the second half of the wall statement. You can also use your finger to make sure they vinyl is adhering to the wall.
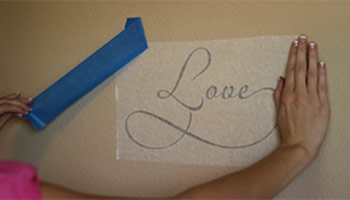
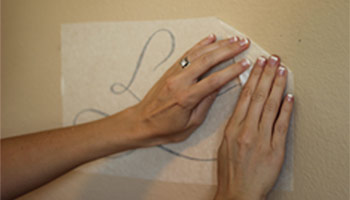
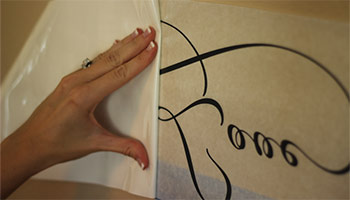
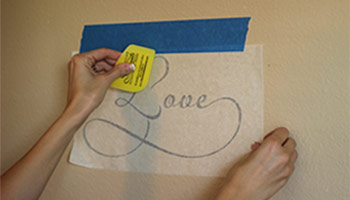
Starting in the center and working your way out avoid bubbles. Then use your squeegee to smooth over the entire wall statement, adhering the vinyl to the wall (4A). Firmly smooth the edges of each letter to ensure contact with the wall. Don’t be afraid to push firmly, you want to make sure that the vinyl is adhering well to the wall.
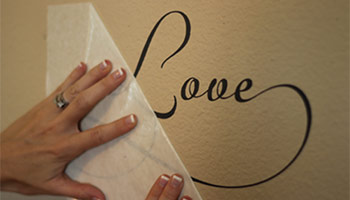
STEP 5: Removing the Transfer Tape
Remove any remaining painters tape from the wall (5A). Slowly begin peeling the transfer tape back from the wall as straight as possible so that you are staying as close to the wall as you peel. Using the same technique as in removing the backing paper, SLOWLY roll the transfer tape under your fingers, almost creating a crease in the transfer tape (5B & 5C). Make sure that all letters are sticking to the wall and that none are left on the transfer tape. TAKE YOUR TIME on this step making sure the vinyl is sticking to the wall. If there is vinyl sticking to the transfer tape simply lay the tape back down on the wall and firmly press on the area to adhere the vinyl to the wall and then continue peeling. Once you have successfully applied your vinyl statement you will discard the transfer tape and be left with the final product (5D).